Installing a Seven Stars Solar Water Heater requires professional expertise to ensure safety, durability, and maximum heating efficiency. Proper installation helps extend the system’s lifespan while delivering reliable hot water using clean solar energy.
This guide outlines the step-by-step process for installing a Seven Stars SS Solar Water Heater, including critical safety checks and best practices.
The installation process involves assembling the mounting frame, securing the system to the roof, installing the insulated storage tank, connecting plumbing lines, and inserting the vacuum tubes correctly.
Key safety measures include ensuring adequate roof support, sealing all plumbing connections, installing required pressure-relief valves, and filling the system at the correct time to prevent thermal shock.
Step-by-Step Installation Process
1. Assembling and Mounting the Frame
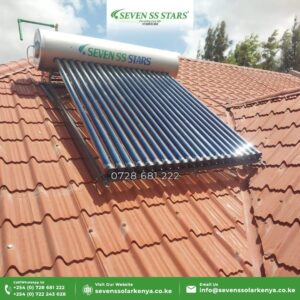
The technician begins by assembling the solar water heater mounting frame, ensuring it is strong and properly aligned. The frame is then securely mounted on the roof using lag bolts and flashing to prevent leaks.
✔ The roof structure must be able to support the full weight of the tank when filled with water
✔ The frame must be level and positioned for optimal sun exposure
2. Placing the Insulated Storage Tank
Once the frame is secure, the insulated solar storage tank is carefully lifted and placed onto the frame.
✔ Ensure the tank is level and aligned for proper water flow
✔ For non-pressurized solar water heater systems, install the assistant tank at this stage
Proper tank placement is essential for efficient heating and gravity-based water circulation.
3. Installing the Vacuum Tubes
The technician applies soap or lubricant to the rubber seals on the vacuum tubes to allow smooth insertion.
✔ Insert each vacuum tube carefully into the tank manifold
✔ Ensure each tube is seated correctly to prevent leaks and heat loss
Correct vacuum tube installation is critical for optimal solar heat absorption.
4. Plumbing Connections
Next, all water connections are completed:
✔ Connect the cold water inlet to the solar tank
✔ Connect the hot water outlet, ensuring correct height for gravity flow in non-pressurized systems
✔ Use thread tape sealant on all fittings for watertight connections
For Pressurized Seven Stars Solar Water Heaters, a PT (Pressure & Temperature) relief valve must be installed with a drain line for safety compliance.
5. Filling the System & Final Testing
To prevent damage from thermal shock, the system must be filled with cold water early in the morning or late in the evening before the vacuum tubes heat up.
✔ Fill the system slowly with cold water
✔ Check all plumbing joints for leaks
✔ Test all hot water outlets to confirm proper flow and heating
Once testing is complete, the Seven Stars Solar Water Heater is ready for safe and efficient operation.
Why Professional Installation Matters
Proper installation ensures:
-
Maximum solar heating efficiency
-
Long-term durability of vacuum tubes
-
Safe pressure management
-
Leak-free plumbing connections
For best results, installation should always be handled by a qualified solar water heater technician.
Reach us Today : 0728-681-222 / 0722-243-028
Location : Kellico Complex Ground Floor